Part 1: Implementation in the Linux Kernel Firewall
Part 2: Integration in SSH Clients
Part 3: Not published yet.
At the end of the first part of this tutorial, we were able to manually unblock the SSH service in the firewall to establish a connection to the server by knocking on. This additional step will now be eliminated by integrating port knocking into the SSH client.
We will look at examples of different integration methods for the two most popular SSH clients under Linux (and other Unix and Unix-like OS) and Windows; OpenSSH and PuTTY.
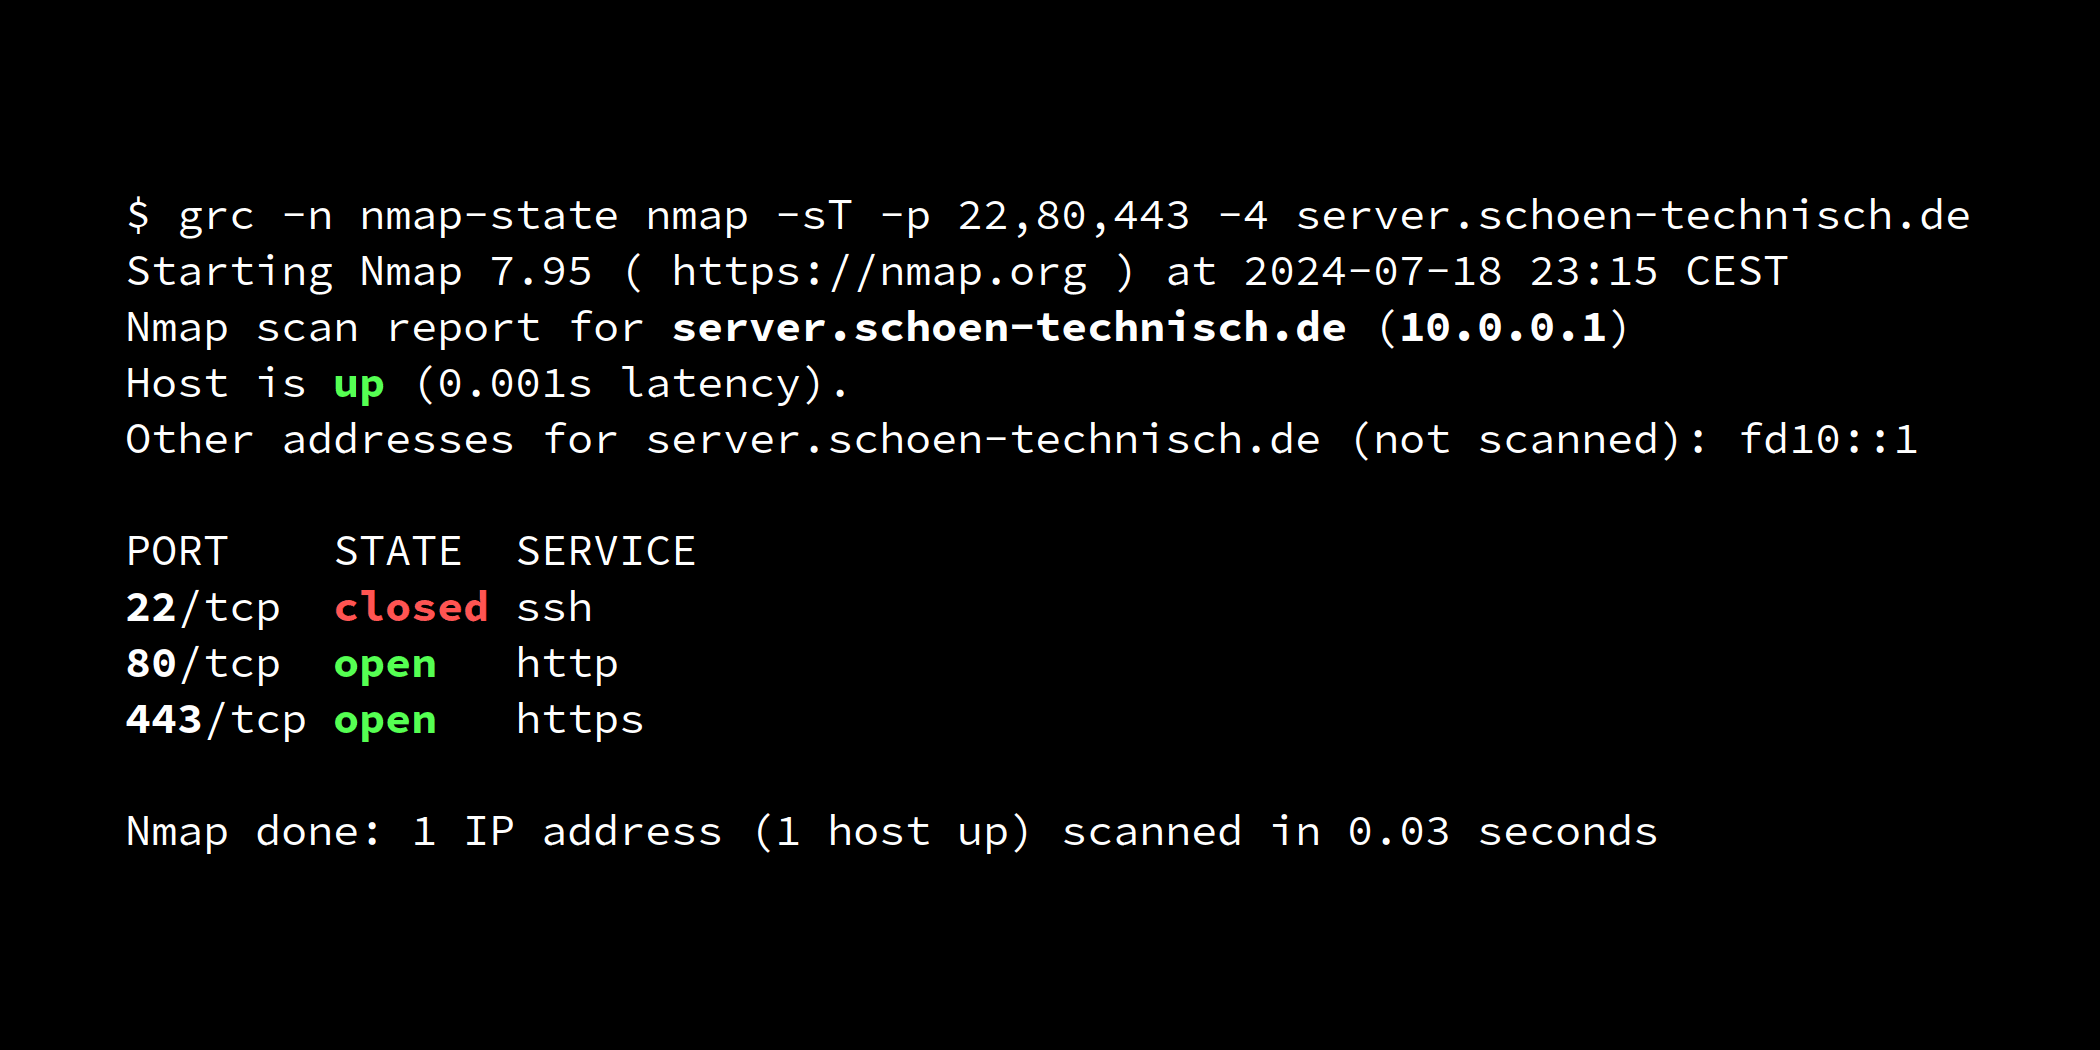
As in the previous part, we send the credential lduiSyvSwYZzwp9OfPiMtVRYj9n6R7e9 as a UDP datagram to port 34567 to unblock the SSH service on the server server.schoen-technisch.de.
Integration in OpenSSH
The OpenSSH client does not directly provide means for the integration of commands that are to be executed locally before the connection is established. However, there are two functions that can be misused for our application:
- The configuration directive
Matchprovides the criteria keywordexec, which is normally used to utilise the return value of a command as a criterion. Among others, the placeholder%his available within the command, which expands to the hostname of the server. - The
Hostconfiguration directive provides theProxyCommandsub-directive, which can be used to define a command via which the SSH connection is to be established using stdin and stdout. The command includes the placeholders%hfor the hostname and%pfor the SSH port of the server. As multiple commands can be chained, we can use the connection proxies described in the previous part to send the UDP datagram with the credential in a first call, and to connect stdin/stdout to the server's SSH service with a TCP connection using a second call.
Configuration files of the OpenSSH client
All configuration directives described here should be stored in a configuration file of the OpenSSH client. The OpenSSH client accesses a system-wide as well as a user-specific configuration file.
The system-wide configuration file is usually found under /etc/ssh/ssh_config on Linux systems and under %PROGRAMDATA%\ssh\ssh_config on Windows systems. The user-specific configuration file, on the other hand, can be localised/placed under Linux with the path ~/.ssh/config or under Windows with the path %USERPROFILE%\.ssh\config.
With the exception of special multi-user environments, it is recommended to use the user-specific configuration file.
Alternatively, it is also possible to use a completely different configuration file and specify it with -F when calling SSH, or to load it from another file from one of the standard configuration files using the Include directive. This is useful, for example, if the file with the credentials is to be stored on a USB thumb drive, in an encrypted directory, or similar.
Integration via Match exec
This method is particularly suitable for users of Linux and other Unix and Unix-like OSs that use the Bash shell, or their system at least provides it, since we can work entirely without a TCP proxy then.
With the following configuration, OpenSSH knocks on port 34567 with a UDP datagram with the credential lduiSyvSwYZzwp9OfPiMtVRYj9n6R7e9 when connecting to the server server.schoen-technisch.de:
Match final host server.schoen-technisch.de exec "echo -n 'lduiSyvSwYZzwp9OfPiMtVRYj9n6R7e9' >/dev/udp/%h/34567"
SSH client configuration for fully automatic knocking when establishing a connection with Match exec under Linux/Unix.
OpenSSH supports internal rewriting and canonisation of hostnames. This can also be used for aliases, for example. The final criteria keyword ensures that the Match directive is only used in the last step of resolving the hostname, as otherwise the server might be knocked on several times.
As it makes sense to use a separate credential for each server, the Match directive is restricted to a specific hostname by means of a host criterion before the actual knocking is carried out with the exec "criterion".
From now on, the connection to the server should also work without manual knocking:
$ ssh user@server.schoen-technich.de
Last login: Thu May 30 12:14:31 2024 from 10.0.0.2
[user@server ~]$
A successful SSH connection with automatic knocking.
In environments where Bash is present on the system but is not the user's default shell, bash -c can be used to execute the command within a Bash subshell.
Alternatively, the OpenBSD netcat, Nmap ncat or socat tools presented in the first part of the tutorial can be used to transfer the credentials as a UDP datagram.
Integration via ProxyCommand
This method is particularly suitable for all cases in which one wants to work with a knocking tool that can also be used as a TCP proxy, or if a configuration file already uses Host nodes to define server-specific settings.
In the configuration file, Host nodes are created first for each server, to which sub-directives are then added. One of these sub-directives is ProxyCommand, which we will use for a different purpose. It is actually only intended for the connection of a proxy tool for establishing the SSH connection instead of ssh's own network functionality, so that after knocking we have to establish the network connection to the server via a tool which connects stdin and stdout to the server's SSH port via TCP. In common Linux/Unix shells, the knocking and proxying commands are simply separated using ; – under Windows it is a little less straight-forward, more on this later. The placeholder %h is replaced by OpenSSH with the host name of the server, and %p with the SSH port.
OpenBSD netcat on Linux/Unix
The resulting OpenSSH configuration entry for port knocking and proxying using OpenBSD netcat under Linux/Unix then looks as follows:
Host server.schoen-technisch.de
  ProxyCommand echo -n "lduiSyvSwYZzwp9OfPiMtVRYj9n6R7e9" | netcat -u "%h" 34567; netcat "%h" "%p"
SSH client configuration for fully automatic knocking when establishing a connection, and proxying using OpenBSD netcat under Linux/Unix.
If required, the Host node can also be supplemented with additional configuration options (man 5 ssh_config), e.g. User to specify the username on the server, Port to specify a different SSH port, or Hostname to specify the server hostname or its IPv4 or IPv6 address. E.g. specifying Hostname makes sense if you would prefer to use an abbreviation or other alias for Host instead of the full hostname of the server, so that a connection can be established using ssh <alias>. The same applies if you want to use an IP address instead of a hostname with Hostname in order to be independent of functioning DNS resolution, and as protection against possible DNS-based attacks.
If one wished to use the SSH configuration file for knocking on the same UDP port with the same credential when establishing SSH connections to any server, Host * can be used instead of Host <hostname|alias> to set the following sub-directives for all connections.
Nmap ncat on Linux/Unix
To use Nmap ncat instead of OpenBSD netcat as a knocking tool and TCP proxy, the SSH client configuration snippet looks like this:
Host server.schoen-technisch.de
  ProxyCommand echo -n "lduiSyvSwYZzwp9OfPiMtVRYj9n6R7e9" | ncat --send-only -u "%h" 34567; ncat "%h" "%p"
SSH client configuration for fully automatic knocking when establishing a connection, and proxying using Nmap ncat under Linux/Unix.
socat on Linux/Unix
For socat, however, a configuration snippet of this type can be used:
Host server.schoen-technisch.de
  ProxyCommand echo -n "lduiSyvSwYZzwp9OfPiMtVRYj9n6R7e9" | socat -t 0 STDIO "UDP-SENDTO:%h:34567"; socat STDIO "TCP:%h:%p"
SSH client configuration for fully automatic knocking when establishing a connection, and proxying using socat under Linux/Unix.
With socat, please note that due to the use of : in the address syntax, the connection to IPv6 addresses is not possible without adjustments, regardless of whether it is given on the command line or by a Hostname sub-directive. If an IPv6 address is to be knocked on directly, the placeholder %h must be replaced with [%h] in both commands of the command chain.
Nmap ncat on Windows
Seit Windows 10 Release 1803 ist OpenSSH fester und standardmäßig installierter Bestandteil von Windows. Allerdings ist die Erzeugung von UDP-Datagrammen und TCP-Proxying nur eher umständlich mit Bordmitteln wie Powershell zu bewerkstelligen. Ncat aus dem Windows-Build von Nmap ist jedoch (anders als diverse andere netcat-Portierungen für Windows) gut gepflegt und uneingeschränkt zu empfehlen.
Since Windows 10 release 1803, OpenSSH is a fixed component of Windows and installed by default. However, the generation of UDP datagrams and TCP proxying is rather complicated to manage with on-board tools such as Powershell. However, ncat from the Windows build of Nmap is well maintained and can be recommended without reservation (unlike various other netcat ports for Windows).
On Linux/Unix, wrapping the ProxyCommand command is optional and only necessary when using a very special shell. On Windows, however, the command is not executed with a standard command interpreter, so wrapping is necessary – in our case with cmd /c, as this command interpreter should be available on all installations.
Unfortunately, the echo command of cmd does not support a parameter that suppresses the line feed at the end of a line (or carriage return + line feed in Windows), so we have to use a hack; we set an anonymous variable using and output its content set /p, while either a line feed must be passed to stdin to confirm set, or stdin must be closed by a pipe-in of NUL. With cmd, the port knocking command and TCP proxying command are concatenated using &.
Host server.schoen-technisch.de
  ProxyCommand cmd /c "echo | set /p="lduiSyvSwYZzwp9OfPiMtVRYj9n6R7e9" | ncat --send-only -u "%h" 34567 & ncat "%h" "%p""
SSH client configuration for fully automatic knocking when establishing a connection, and proxying using Nmap ncat under Windows.
Limitation when using ProxyCommand
The integration of the knocking command into the SSH configuration is accompanied by a slight restriction: The SSH parameters -4 and -6 and the OpenSSH configuration option AddressFamily for specifying the address family for establishing a connection to either IPv4 or IPv6 no longer have any effect, as the resolution of the hostname and the selection of the address family now depend on the proxy tool used and no longer on SSH inself. This can be circumvented in two ways:
- Option 1: The knocking/proxy tool used is itself instructed to send/establish the datagram or connection via either IPv4 or IPv6. With all three tools presented here (
netcat,ncatandsocat), this is done via the command line parameters-4or-6. - Option 2: The connection is explicitly established to the IPv4 or IPv6 address of the server. The respective IP address can also be added to the
Hostsection of the server as aHostnamesub-directive.
Only when using socat the restriction on the specification of IPv6 addresses described in the corresponding section above must be taken into account.
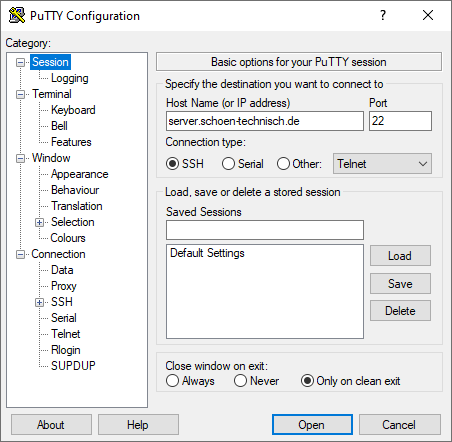
Integration in PuTTY
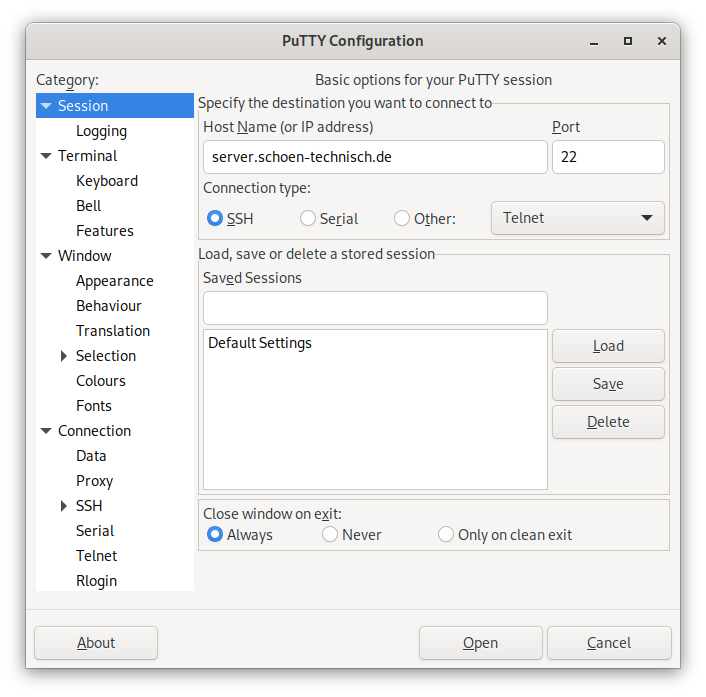
The most popular graphical SSH client is PuTTY, and its proxy function can also be repurposed for our port knocking in the same way as OpenSSH.
To do so, go to Connection ➔ Proxy. For Proxy type select mode Local (run a subcommand to connect). For Command to send to proxy (for some types) then the ProxyCommand command from the previous OpenSSH examples entered, which we however have to adapt as follows:
PuTTY replaces the hostname of the SSH server in the proxy command with the placeholder %host instead of %h, and the port with the placeholder %port instead of %p. In addition, PuTTY also provides other input fields with their own placeholders, here for example proxy hostname and port, which we can use for our credentials and the UDP port to be used for knocking. We can access this data via the placeholders %proxyhost and %proxyport.
The settings can then be saved via PuTTY's session management, either as default settings or (sensibly supplemented by the server's hostname and, if applicable, user name and port) as a server-specific session.
OpenBSD netcat on Linux/Unix
The resulting command with OpenBSD netcat for Unix/Linux looks like this:
echo -n "%proxyhost" | netcat -u "%host" "%proxyport"; netcat "%host" "%port"PuTTY proxy command for fully automatic knocking when establishing a connection, and proxying using OpenBSD netcat under Linux/Unix.
The command chains with Nmap ncat and socat from the above ProxyCommand directives for OpenSSH can be converted analogously if required.
For our example server, this results in the following configuration for PuTTY under Linux/Unix:
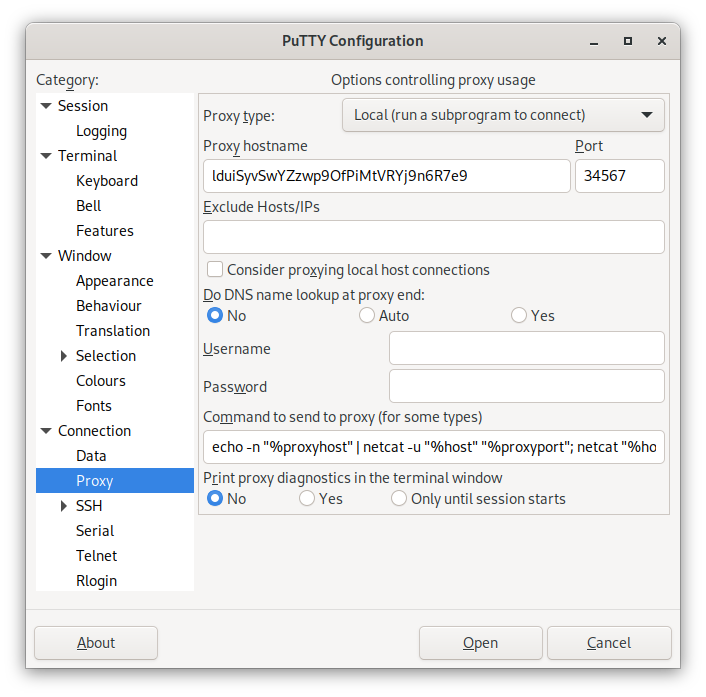
Configuration of PuTTY for fully automatic knocking when establishing a connection using OpenBSD netcat under Linux/Unix.
Nmap ncat on Windows
Analogous to the adaption of the OpenBSD netcat ProxyCommand for PuTTY on Linux/Unix, the ProxyCommand for Nmap ncat under Windows adapted for PuTTY looks like this:
cmd /c "echo | set /p="%proxyhost" | ncat --send-only -u "%host" "%proxyport" & ncat "%host" "%port""PuTTY proxy command for fully automatic knocking when establishing a connection and proxying using Nmap ncat under Windows.
The result for our example server with PuTTY under Windows is as follows:
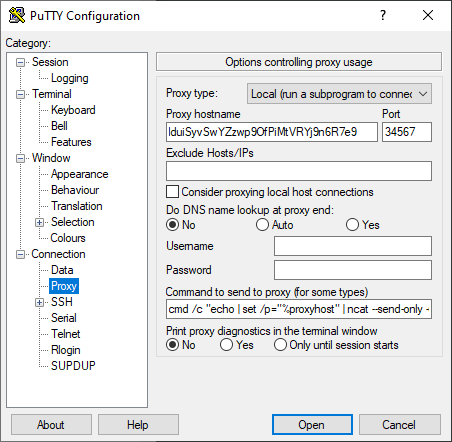
Configuration of PuTTY for fully automatic knocking when establishing a connection using Nmap ncat under Windows.
Update 2024-12-06: udpsend
Reader Enrico Heine developed the lightweight tool udpsend written in C++ for the sole purpose of sending port-knocking credentials over UDP. It is cross-platform and builds on Linux and other unices as well as on Windows. For convenience, a ready-made Windows binary is available on the releases page. An Android version to be published in the Play Store is to follow.
Review and prospect: Integrating credentials into other protocols
In this second part of this tutorial, we have now worked out how easy it is to integrate our credential port knocking into SSH clients, even if they do not actually provide functionality for this, and now we can log in to our server as usual without any additional steps despite port knocking.
In the third and final part of the series, we will learn how the credential can be integrated discretely into datagrams of other protocols such as ICMP echo requests (ping) or SNMP queries. This allows knocking to be made less noticeable and upstream firewalls to be crossed without opening additional port.
Previous part: Credential Port Knocking, Part 1: Implementation in the Linux Kernel Firewall
 Veit Wahlich