Unlike RedHat Enterprise Linux, AlmaLinux OS and Oracle Linux, Rocky Linux does not yet officially support in-place upgrades to the next major version.
Usually the solution here is AlmaLinux's ELevate project, which supplements RedHat's Leapp with data for the major upgrade of other EL distributions. Unfortunately, no leapp-data-rocky package has been published for Rocky 9 yet.
Performing a manual upgrade is more complex, but anything but witchcraft, and therefore shouldn't be an obstacle for any advanced systems administrator. This tutorial is based on my personal experience of manually upgrading numerous systems from Rocky Linux 9.6 to 10.0.
Minimum Requirements
Check Instruction Set Architecture
Just as Rocky Linux 9 raised the ISA baseline for x86 systems from x86-64-v1 to x86-64-v2, Rocky Linux 10, like its upstream counterpart RedHat Enterprise Linux 10, raises it to x86-64-v3.
Among Intel processors, this is supported by desktop and server processors from the Haswell microarchitecture onwards - i.e. Xeon E3/E5/E7 from v3, Core i3/i5/i7 from series 4xxx, Pentium from G32xx/G33xx/G34xx and Celeron from G18xx.
Intel mobile processors support this ISA level from the Gracemont microarchitecture onwards.
AMD desktop and server processors have supported this ISA level since the Excavator microarchitecture, mobile processors since the Excavator+ microarchitecture.
In virtual machines, it must be ensured that all processor instructions/features required to reach the respective ISA level are passed on to the VM, depending on the hypervisor, either by selecting the correct virtual processor model, passing on the model of the host CPU or manually activating the features for the guest, or by selecting the correct version of the guest operating system.
The currently available ISA level can be checked with this practical awk script by Frank Cox:
#!/usr/bin/awk -f

BEGIN {
    while (!/flags/) if (getline < "/proc/cpuinfo" != 1) exit 1
    if (/lm/&&/cmov/&&/cx8/&&/fpu/&&/fxsr/&&/mmx/&&/syscall/&&/sse2/) level = 1
    if (level == 1 && /cx16/&&/lahf/&&/popcnt/&&/sse4_1/&&/sse4_2/&&/ssse3/) level = 2
    if (level == 2 && /avx/&&/avx2/&&/bmi1/&&/bmi2/&&/f16c/&&/fma/&&/abm/&&/movbe/&&/xsave/) level = 3
    if (level == 3 && /avx512f/&&/avx512bw/&&/avx512cd/&&/avx512dq/&&/avx512vl/) level = 4
    if (level > 0) { print "CPU supports x86-64-v" level; exit level + 1 }
    exit 1
}
Check RAM
EL10 officially requires at least 2 GiB RAM. From experience, however, this is only necessary during a regular, graphical installation and for an upgrade using Leapp/ELevate.
For the manual upgrade as described here, as well as for later operation, 1 GiB RAM is usually sufficient for systems with moderate requirements of the running services. A prerequisite should be that all memory-intensive applications or services are stopped/deactivated while performing the upgrade.
Check available disk space
Sufficient storage space must be available on the system file systems for performing the upgrade. The actual requirements however heavily depend on the software packages installed.
For a server installed from a minimal system without a graphical user interface, 5 GiB of free space on the / file system should be sufficient in most cases.
I even successfully upgraded some simple VMs with less than 2 GiB available without increasing the size, but those systems were missing the linux-firmware package, which has become huge in the past, as this package is not required for the operation of my VMs.
The storage space requirements for the /boot file system are unchanged for EL10 compared to EL9.
I.e. 1 GiB with the default settings are absolutely sufficient, or even 512 MiB when using installonly_limit=3. For UEFI systems, the requirements for /boot/efi have not changed either.
Check file system types
The officially supported types for local file systems in EL10 are still XFS and ext4.
If other local file systems are used, compatibility must be ensured. File systems that are no longer supported may need to be migrated beforehand, or a new installation may need to be considered instead.
For file systems that exist but are not officially supported (e.g. btrfs), operation without official support may also be considered, depending on the system requirements.
Preparatory work
Create a backup/snapshot
As this is not an officially supported procedure, a complete backup of the system and/or snapshot of the machine is particularly important in order to be able to return to the initial state in an emergency.
Deactivate services if necessary
It may also be advisable to deactivate services that may be accessed by third parties during the upgrade, and to reactivate them after the upgrade.
This is particularly useful if data changes may be made via these services, that would be reset if returning to a snapshot or restoring a backup.
$ systemctl disable --now <...>Update Rocky 9 packages to the latest version
Firstly, make sure that Rocky 9 is up to date. If important system updates such as kernel, systemd or glibc have been installed, the system must always be restarted.
$ dnf upgrade --refresh
[...]

$ reboot
Install Rocky 10 release packages
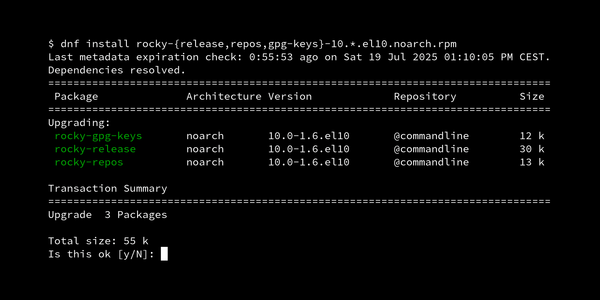
The Rocky 10 release, repo and GPG keys packages must be downloaded and installed locally. At least for the GPG keys package, it is not possible to install it directly from the repo, as the packages are signed with the GPG keys of Rocky 10, which we still lack without this package being install.
$ dnf download --releasever=10 rocky-{release,repos,gpg-keys}
[...]

$ dnf install rocky-{release,repos,gpg-keys}-10.*.el10.noarch.rpm
If the .repo files in /etc/yum.repos.d/ had been changed in the past (e.g. by activating the CRB repository), they will be created as .repo.rpmnew files during the update of rocky-repos as described above (check output of dnf install above!) and this needs to be addressed.
The easiest way to do this is interactively using rpmconf from EPEL:
$ rpmconf -o rocky-repos
[...]
Alternatively, this can also be done manually by examining the differences and renaming the .repo.rpmnew files:
$ diff /etc/yum.repos.d/rocky.repo.rpmnew /etc/yum.repos.d/rocky.repo
[...]

$ mv /etc/yum.repos.d/rocky.repo.rpmnew /etc/yum.repos.d/rocky.repo
Dealing with third-party repositories
If third-party repositories collide during the above installation of the new Rocky release (e.g. remi-release), these may either be removed for the upgrade and then reinstalled after, or they are also updated (Remi for EL10: https://rpms.remirepo.net/enterprise/remi-release-10.rpm), but the latter may lead to further problems (e.g. use of the variable $releasever_major in the .repo files, which would need to be changed to $releasever during the upgrade).
Other repositories such as epel-release should be uninstalled and can be reinstalled after the upgrade. The same applies to conflicting packages.
$ dnf remove epel-release
[...]
Remove untracked artefacts
If present, colliding files and directories that may not be tracked by package management must be removed.
A typical candidate reported for such artefacts is /usr/share/redhat-logos/:
$ rm -Rf /usr/share/redhat-logos/However, this was not necessary on any of my systems.
Perform upgrade
Clean up DNF and start distro sync
Firstly, the DNF cache should be emptied completely (repository data, packages etc.) and then the actual distro upgrade is carried out.
During the distro upgrade, we allow the removal of packages for dependency reasons, but disable the removal of packages which are just supposedly no longer required.
DeltaRPMs are also deactivated, if active, as they are not offered across major versions. In most cases, the savings from this have proven to be negligible anyway, so that various distributions have already abolished them.
$ dnf clean all
[...]

$ dnf distro-sync --releasever=10 --allowerasing --noautoremove --setopt=deltarpm=false
[...]
All packages removed due to dependency issues should be documented (Removing dependent packages section), so that they can be reinstalled later, if required.
Most of these usually originate from the previously deactivated third-party repositories and must be temporarily removed for dependency reasons, as they cannot be automatically upgraded to their respective EL10 version due to the unavailability of their repository.
Any unfulfilled dependencies or file conflicts must also be resolved.
Deactivate KDump if necessary
If KDump is installed but not active on EL9, EL10 may automatically reactivate it each time a new kernel is installed.
If this is not desired, the parameter auto_reset_crashkernel must be set to no in /etc/kdump.conf and then Grub must be reconfigured:
$ nano /etc/kdump.conf
[...]

$ grubby --update-kernel=ALL --remove-args='crashkernel=2G-64G:256M,64G-:512M'
[...]
Convert legacy network configuration
Thanks to the ifcfg-rh module, NetworkManager was still able to load ifcfg files of the obsolete network-scripts on EL9. These are no longer supported by EL10.
If the system is still actively using network configuration files in /etc/sysconfig/network-scripts/, these must be converted to .nmconnection files and stored in /etc/NetworkManager/system-connections/.
As a simple template, here is an example for the eth0 interface with static IPv4 and dynamic IPv6 configuration, to be saved as eth0.nmconnection:
[connection]
id=eth0
interface-name=eth0
type=ethernet
autoconnect=true

[ipv4]
method=manual
address1=10.0.0.11/24
gateway=10.20.0.1
dns=10.0.0.53;10.0.0.1
#dns-search=schoen-technisch.de

[ipv6]
method=auto
addr-gen-mode=eui64
All .nmconnection files must be assigned 0600 permissions, otherwise NetworkManager will ignore them, regardless of whether they contain e.g. secret credentials or not:
$ chmod 0600 /etc/NetworkManager/system-connections/eth0.nmconnectionCreate initramfs for new kernel if required
If there was a legacy network configuration as described above, and this configuration was also part of the initramfs, this may not have been created while installing the new EL10 kernel due to the unavailability of the Dracut module network-legacy, so that the system would not be bootable with the new EL10 kernel (however booting with an old EL9 kernel should still be possible in an emergency).
In this case, the initramfs for the new kernel must be generated while omitting network-legacy.
In my case, this problem particularly affected systems that were originally installed as EL7 (e.g. CentOS 7) or older, and were repeatedly upgraded since.
On these systems the Dracut config snippet /etc/dracut.conf.d/50-network-legacy.conf caused the issues, which explicitly added the network-legacy to the list of Dracut modules.
The following commands remove the config snippet and create all missing initramfs:
$ rm -f /etc/dracut.conf.d/50-network-legacy.conf

$ dracut --regenerate-all
[...]
All pre-existing initramfs remain untouched as we did not issue the --force parameter.
Booting into Rocky 10
The system can now be rebooted.
$ rebootAfter the reboot, we should be welcomed by Rocky 10.
Cleaning up
SELinux and RPM database
After the upgrade, the system still needs to be tidied up. Firstly, the SELinux labels of the file systems should be reset and the RPM database should be rebuilt:
$ restorecon -R /

$ rpm --rebuilddb
Reactivating repositories
Now reactivate/reinstall any previously deactivated repositories (in this case CRB and EPEL) and then run a dnf upgrade to update the packages provided by these repositories:
$ dnf config-manager --set-enabled crb
[...]

$ dnf install epel-release
[...]

$ dnf upgrade
[...]
Reinstalling removed packages
If packages had to be removed during the dnf distro-sync command performed above, they can now be reinstalled:
$ dnf install <...>Converting DNF modules
If packages from the AppStream were installed via DNF modules on the EL9 system, these streams are probably no longer available under EL10. These are now usually listed under the @modulefailsafe label:
$ dnf module list
[...]
@modulefailsafe
Name      Stream       Profiles                  Summary
mariadb   10.11 [e]    client, galera, server    MariaDB Module
[...]
Such modules must be removed from /etc/dnf/modules.d/ by deleting or renaming the associated files and reinstalling the packages they contained. If EL10 provides the packages, they can be updated to their EL10 counterparts after the module has been removed:
$ dnf upgrade
[...]
==========================================================================
 Package                Architecture  Version            Repository  Size
==========================================================================
Upgrading:
 mariadb                x86_64        3:10.11.11-1.el10  appstream   1.6 M
 mariadb-backup         x86_64        3:10.11.11-1.el10  appstream   6.6 M
 mariadb-common         noarch        3:10.11.11-1.el10  appstream    35 k
 mariadb-errmsg         noarch        3:10.11.11-1.el10  appstream   261 k
 mariadb-gssapi-server  x86_64        3:10.11.11-1.el10  appstream    16 k
 mariadb-server         x86_64        3:10.11.11-1.el10  appstream   9.9 M
 mariadb-server-utils   x86_64        3:10.11.11-1.el10  appstream   260 k
Installing weak dependencies:
 mariadb-client-utils   x86_64        3:10.11.11-1.el10  appstream    39 k

Transaction Summary
==========================================================================
Install  1 Package
Upgrade  7 Packages

Total download size: 19 M
Is this ok [y/N]:
If this does not work, the packages associated with the module must be uninstalled using dnf remove and then reinstalled from the regular AppStream using dnf install.
Obsoleted packages and unfulfilled dependencies
You should now search for unfulfilled package dependencies and obsoleted packages:
$ dnf repoquery --unsatisfied
[...]

$ dnf list obsoleted
[...]
Now it's time to take care of all other remaining EL9 packages. Even with third-party repos, these usually feature an el9 in the release part of the version string, which we can grep for.
$ dnf list | grep 'el9'
[...]
All listed packages must be checked to see whether they are obsoleted packages, which should then be removed or replaced.
For packages that can be installed multiple times (e.g. kernel and kernel-* packages), the version must be specified when uninstalling. The output of rpm -qa may be more useful here:
$ rpm -qa | grep 'el9' | grep '^kernel'
kernel-modules-core-5.14.0-570.23.1.el9_6.x86_64
kernel-core-5.14.0-570.23.1.el9_6.x86_64
kernel-modules-5.14.0-570.23.1.el9_6.x86_64
kernel-5.14.0-570.23.1.el9_6.x86_64
kernel-core-5.14.0-570.25.1.el9_6.x86_64
kernel-modules-core-5.14.0-570.25.1.el9_6.x86_64
kernel-modules-5.14.0-570.25.1.el9_6.x86_64
kernel-5.14.0-570.25.1.el9_6.x86_64

$ dnf remove kernel{,-core,-modules,-modules-core}-{5.14.0-570.23.1.el9_6,5.14.0-570.25.1.el9_6}.x86_64
[...]
Completing the upgrade
Reboot and check error messages
Now reboot the system one last time to make sure that everything is perfectly up and running:
$ rebootImmediately after this, we check whether the kernel has logged errors (priority 3 or more critical) at system start-up that should be dealt with:
$ journalctl -p 3 -xb
[...]
It may also do no harm to include warning messages (priority 4).
Reactivate services
Finally, we re-enable and start all services that we may have deactivated for the upgrade earlier.
$ systemctl enable --now <...>If everything runs as expected, the machine may go back into operation.